




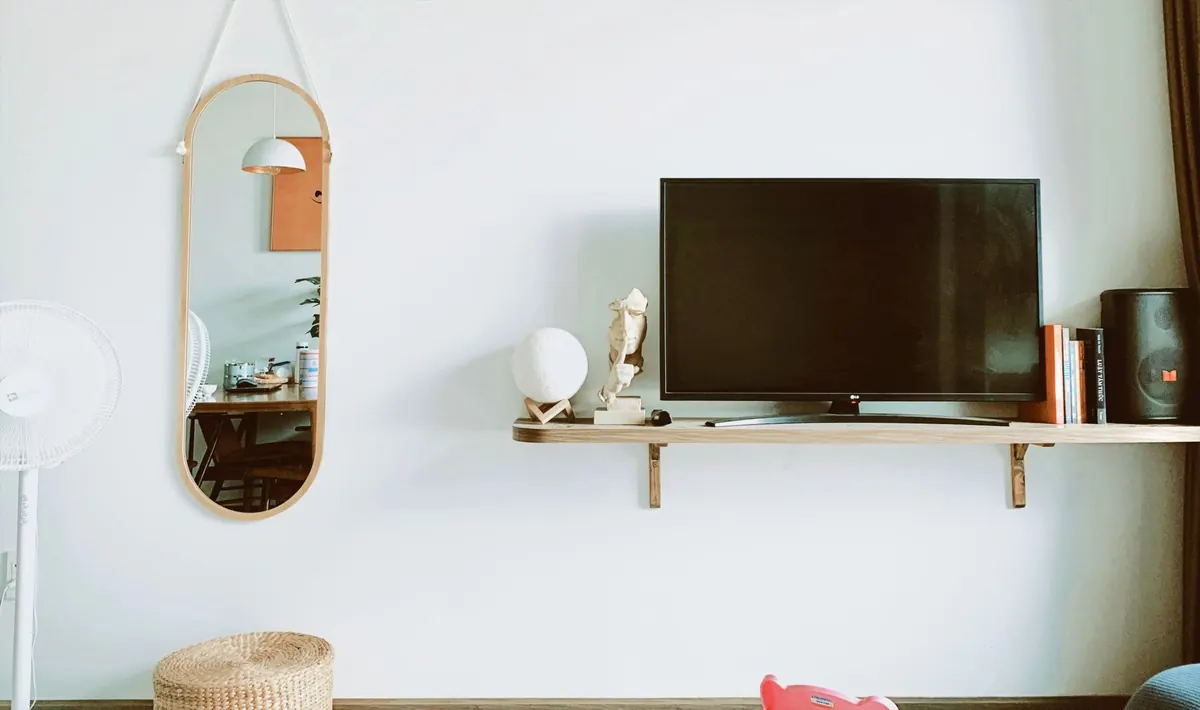
A floating shelf looks like a magic trick: no brackets underneath, no uprights at the ends, just a clean line of wood coming out of the plaster. The trick is refreshingly simple. The shelf is a shallow hollow box, open at the back, that slides over a strip of wood screwed to the wall. Nothing shows, nothing wobbles, and the whole thing comes out of one eight-foot pine board. It is also a forgiving first project, because every mistake you might make lives inside the box where nobody will ever look.
What You Are Actually Building
A standard 1 x 8 pine board is not 1 inch by 8 inches. It measures 3/4 inch thick and 7-1/4 inches wide, and once you start planning cuts around those real numbers, everything falls into place.
The finished shelf here is 30 inches long, 7-1/4 inches deep and 2-1/2 inches thick. It consists of five pieces: a top panel, a bottom panel, a front edge that covers the seam between them, two small end blocks that close the sides, and a wall cleat that lives inside the finished box.
The mechanics are blunt and reliable. The cleat is screwed to the wall. The shelf slides over it so that the underside of the top panel rests on the cleat's upper edge. Gravity holds it down, and a few screws driven up through the bottom panel stop it from sliding forward. The front edge hides the pocket from view, the end blocks hide it from the sides, and from the room you see a solid block of pine.
Tools and Materials
- One 1 x 8 x 8-foot pine board, straight and dry, with tight knots. Sight down its length in the shop before you buy it.
- A circular saw or mitre saw, plus a straight edge or track to guide long rips
- Combination square, tape measure, pencil, painter's tape
- Wood glue and six to eight clamps (or a brad nailer with 1-1/4-inch nails)
- Drill with bits sized to your screws, plus a countersink bit
- Stud finder and a spirit level
- 3-inch wood screws for the cleat, 1-1/2-inch screws for locking the shelf down
- Sandpaper in 80, 120 and 180 grit, plus a sanding block
- Stain-blocking primer and paint, or stain and a wipe-on clear finish
Wear eye protection when sawing and drilling, and use a pipe-and-cable detector before you put any screw into a wall.
Measure, Mark, Cut
Start at the wall. Decide where the top of the shelf will sit, mark that height lightly, and run the stud finder along the line. Note the centre of every stud you find; the cleat will be screwed into them. If your chosen spot has no studs, either shift the shelf or plan on heavy-duty toggle anchors rated for the load, because a pine shelf full of books will find the weakest fixing point in the room.
Cut the board down first, then rip the pieces from those shorter sections. It is far easier to manage a 30-inch length on a sawhorse than an eight-foot one.
- Top and bottom panels: two pieces, 3/4 x 6-1/2 x 30 inches
- Front edge: one piece, 3/4 x 2-1/2 x 30 inches
- End blocks: two pieces, 3/4 x 1 x 6-1/2 inches
- Wall cleat: one piece, 3/4 x 15/16 x 26 inches
Cut the board into 30, 30 and the remaining length. Rip the first two sections down to 6-1/2 inches for the panels, which leaves you two narrow strips you can keep for shims. From the leftover length, rip the 2-1/2-inch front edge first, then the end blocks and the cleat from what remains. Cutting the cleat slightly under an inch matters: a full inch will bind in a one-inch pocket, especially after paint.
Two habits save a lot of grief here. Mark all your measurements from the same end of the board rather than chaining them along, and support the offcut with your free hand or a clamp so the blade does not pinch as the piece separates.
Glue the Box Together
- Dry-fit everything on a flat surface. The panels should sit flush with the front edge's face, and the end blocks should sit flush with the back edges of both panels.
- Lay the bottom panel outside-face down. Glue the front edge along its front end, keeping the ends and the top face flush.
- Glue the end blocks in place, one at each end, pushed tight against the front edge's inner face and flush with the back edge.
- Run a bead of glue along the top edges of the front edge and both end blocks, then set the top panel in place. The two back edges must line up exactly; that face is your wall, and any step there will show as a shadow line.
- Clamp across the width in three or four places and along the front edge. Measure both diagonals across the open back; if they match, the box is square.
- Wipe the squeeze-out with a damp cloth and let it cure overnight. If you have few clamps, drive 1-1/4-inch screws through the end blocks into the panels from inside the pocket, where they will never be seen.
Hang the Cleat and Mount the Shelf
Hold the cleat against the wall at your marked height, check it with the level, and mark the stud centres onto it. Predrill and countersink, then drive 3-inch screws into the studs, two per stud and centred in the cleat's face. If the wall is wavy, slip a thin shim behind the cleat at any low spot rather than forcing it flat; the shelf will follow the cleat, not the plaster.
Slide the shelf onto the cleat now, before the finish goes on, and check the fit. It should go on with a firm push and no rocking. If it binds, sand the top edge of the cleat. If it rattles, add a strip of masking tape along the cleat's lower edge.
Before final mounting, drill pilot holes up through the bottom panel, about 3/8 inch in from the back edge, every 6 to 8 inches. Then slide the shelf home and drive 1-1/2-inch screws through those holes into the cleat. These screws are what stop the shelf tipping forward when you reach for a book at the front, and they also pull the bottom panel tight against the cleat, which cures any small wobble.
Finishing Pine So It Looks Finished
Sand the assembled box with 80 grit, then 120, then 180, always following the grain, and soften the front edge with two or three light passes so it feels good under the hand. Knock off the sharp corners at the ends too. Dust everything off, wipe with a barely damp cloth and let it dry completely.
Pine has two finishing quirks worth planning around. Knots bleed through light paint, so seal them with a shellac-based or stain-blocking primer; and end grain drinks finish unevenly, so a thin coat of sanding sealer on the cut ends keeps colour consistent. If you are painting, two thin coats beat one thick one, with a light 220-grit sand between. If you are staining, a pre-stain conditioner reduces the blotchiness pine is known for, and two or three thin coats of wipe-on poly will stand up to cups and plants. Finish the shelf before you mount it and keep the touch-up pot handy for the screw heads underneath.
Before You Load It Up
Give the finish a few days to harden before you put anything heavy on it. Then load it sensibly: books, jars, small pots, with the heaviest items near the screws rather than at the very ends. Check the level after a week, and if the front lip starts to droop, tighten the screws underneath.
If you want a shelf longer than 30 inches, or one that holds a row of hardbacks, buy a ten-foot board, add six inches to every length in the cut list, and consider a second cleat above the first. The method stays the same. That is the real pleasure of this project: once you understand the hollow box and the hidden cleat, you can size the next one to any wall in the house.
Photo: Thới Nam Cao / Pexels
Related posts
More stories you’ll love reading